14 Easy Sewing Projects You’ll Love to Make
Easy sewing projects are beginner-friendly and intermediate-accessible makes that require minimal pattern complexity, basic machine or hand sewing skills, and widely available materials — producing genuinely useful, beautiful finished objects that build confidence and technique with every seam. This article gives you exactly 14 easy sewing projects you will love to make, spanning home décor, accessories, gifts, and wearables, with step-by-step guidance and curated product tables for every project.
There is a particular satisfaction in sewing that no other craft quite replicates — the moment a flat piece of fabric becomes a three-dimensional object in your hands, shaped entirely by your own decisions about cut, seam, and finish. Sewing rewards patience with precision, and precision with objects that last. These projects range from a 30-minute first-time beginner make to a half-day project worthy of gifting or selling, and every single one can be completed on a basic home sewing machine with beginner-level skills. Here are 14 ideas worth saving — and stealing.
Why Easy Sewing Projects Work So Well
Home sewing as a craft tradition has roots that predate industrialization — the domestic production of clothing, household linens, and soft furnishings was a foundational skill across every culture until the mid-twentieth century, when mass production made purchased textiles cheaper than homemade ones. The contemporary revival of home sewing draws from multiple converging forces: the slow fashion movement’s rejection of disposable fast fashion, the maker culture’s revaluation of handcraft skill, the sustainability movement’s emphasis on making and repairing over buying and discarding, and a growing awareness that the quality of handmade textile objects — particularly in natural fibers — is genuinely superior to most mass-produced alternatives at comparable cost.
The materials that define the most successful easy sewing projects are accessible, forgiving, and visually rewarding: 100% quilting cotton in solid and print versions for beginners (it cuts cleanly, presses well, and does not slip during sewing), natural linen for home décor projects (its slight texture and natural drape suit cushions, bags, and table linens beautifully), cotton canvas and denim for structural makes like bags and organizers, cotton muslin and lawn for lightweight wearable projects, pre-quilted fabric for quick padded makes, and stretch cotton jersey for confident beginners ready to move into garment sewing. Notions that elevate every project include quality cotton thread matched to the fabric, sharp universal needles changed with every new project, quality pins or wonder clips, and a good seam ripper — the most important tool in any sewist’s kit.
Easy sewing projects are experiencing sustained growth in cultural popularity, with the pandemic years producing a measurable generational surge in new sewists that has continued into the mid-2020s. Pattern companies report consistent growth in beginner pattern sales, fabric retailers have expanded their online presence dramatically, and sewing communities on platforms including Pinterest, Instagram, and dedicated forums like PatternReview have created a global network of makers sharing techniques, finishes, and project inspirations. The sustainability argument for sewing has also become more compelling as the environmental cost of fast fashion has become better understood.
Beginner sewists consistently underestimate how much a single completed project builds confidence and skill. The first project teaches cutting and straight seams; the second adds pressing and pivoting at corners; the third introduces a zipper or button; and by the sixth or seventh project, skills that seemed impossible at the beginning feel entirely natural. The investment in a basic sewing machine — the only significant cost barrier — pays for itself in projects within the first six months of regular use.
Style at a Glance
| Element | Trait 1 | Trait 2 |
|---|---|---|
| Philosophy | Make over buy | Skill building through completion |
| Materials | Quilting cotton, linen, canvas, jersey | Natural fibers, quality thread |
| Color Palette | Warm neutrals, botanical prints | Solid earth tones, classic stripes |
14 Easy Sewing Projects You’ll Love to Make
1. Linen Tote Bag
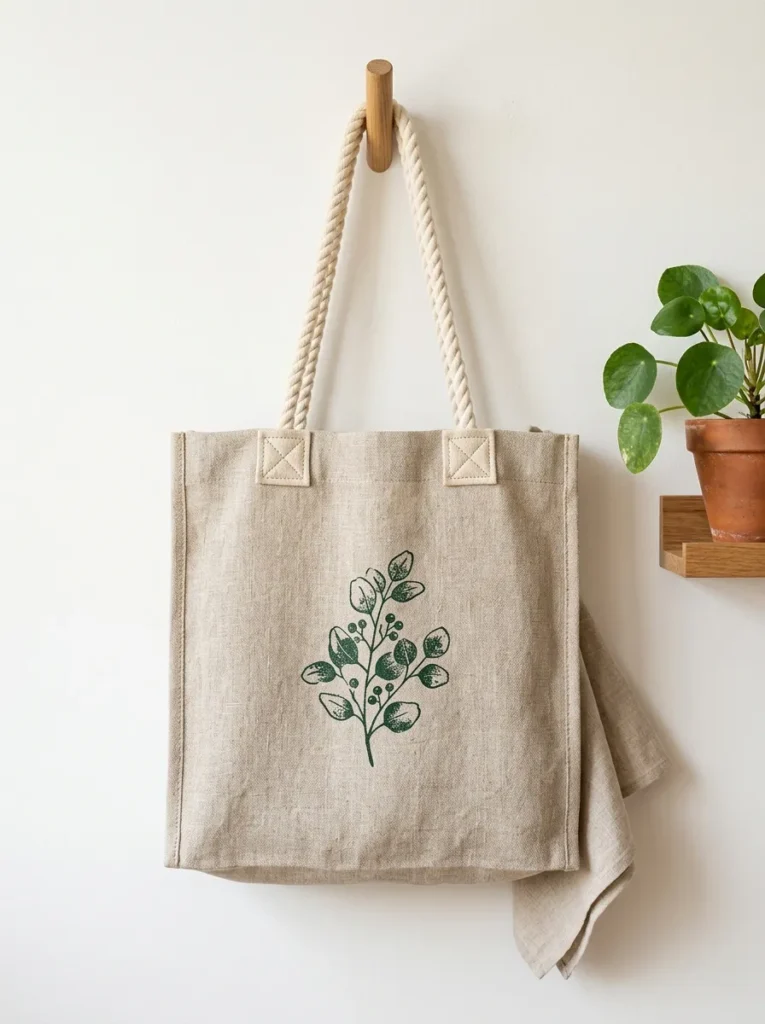
Vibe: The tote feels clean and genuinely useful — the kind of bag you reach for every single day without thinking.
Why it works: The linen tote bag is the ideal first sewing project because it requires only straight seams, no curves, no zippers, and no pattern matching — and produces a finished object of genuine daily utility that the maker will actually use. Natural linen is the best fabric choice for a tote because its weight and slight texture give the finished bag structure without requiring interfacing, it handles washing beautifully, and it improves in softness and drape with every wash cycle. The box-stitch reinforcement at handle attachment points — a simple 2.5cm square stitched with an X inside — is the single technique that separates a bag that lasts years from one that fails at the handles within weeks.
How to get it: Cut two rectangles of medium-weight linen at 40x45cm for the bag body. Place right sides together, stitch the side and base seams at 1.5cm seam allowance, and press seams open. Create a 2cm flat base by folding each bottom corner to align the side seam with the base seam, measuring 3cm from the corner point, and sewing across — this small step transforms a flat pouch into a bag with a standing base. Fold the top edge under twice by 1cm and topstitch. Attach two 60cm lengths of cotton rope or 4cm-wide cotton webbing handles, reinforcing each attachment with a 2.5cm box stitch with X.
Quick Win: Half a meter of medium-weight linen fabric ($4–$7) plus a 1.5-meter length of cotton webbing ($2–$3) produces a complete, durable tote bag for under $12 in materials — significantly less than any equivalent purchased bag of the same linen quality, with the added value of being exactly the size and color you want.
Shop The Look
| Product |
|---|
| Medium weight natural linen fabric by the yard |
| Cotton webbing 4cm wide natural cream handles |
| Cotton thread natural cream 500m reel quality |
| Linen fabric marker water soluble marking pen |
| Wonder clips set 50 piece fabric holding alternative |
2. Quilted Potholder Set (MATERIAL)
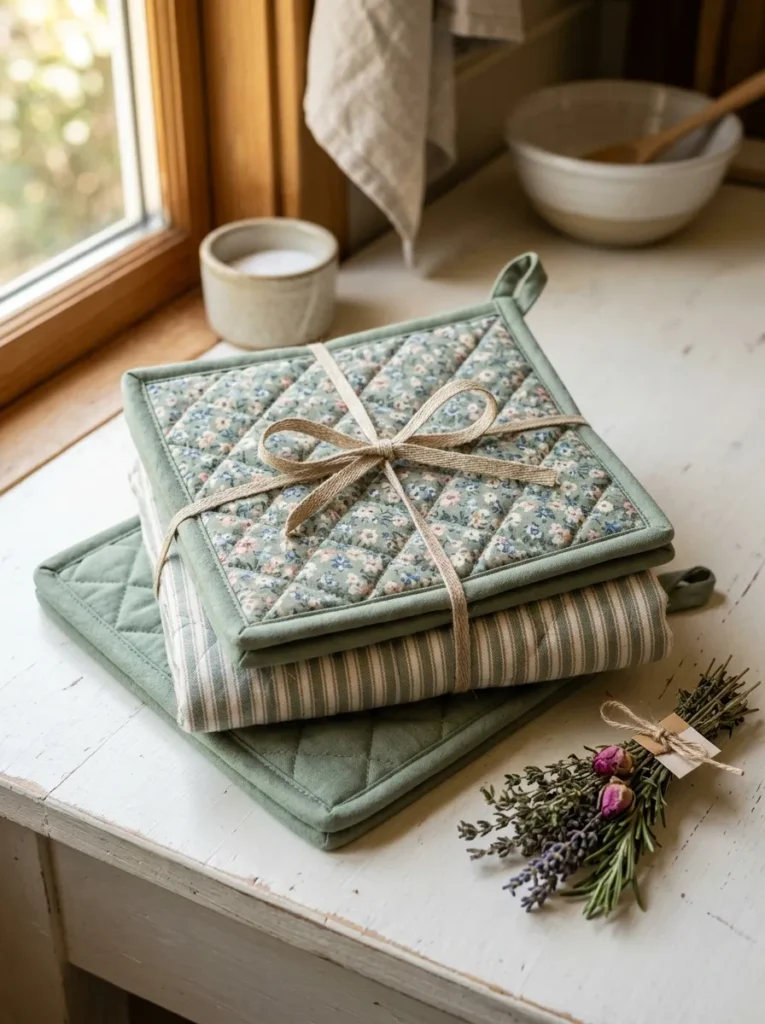
Vibe: The potholders feel warm and handmade — the kind of kitchen gift that looks too good to use and gets used every day anyway.
Why it works: Quilted potholders are the perfect second sewing project because they introduce the binding technique — folding and stitching a fabric strip around a raw edge — which is one of the most transferable skills in all of sewing, used in quilts, bags, garments, and home décor equally. The small scale (a standard potholder is 20x20cm) means any mistake is contained and correctable, and the quilted sandwich construction — cotton top, cotton batting, cotton backing, stitched together — teaches layering and the management of multiple fabric layers simultaneously, which is a foundational skill for more complex projects. The coordinating print set of three makes a genuinely desirable handmade gift.
How to get it: Cut three layers for each potholder: a 22x22cm top fabric square, a 22x22cm layer of cotton batting (use double batting for genuine heat protection — two layers of 100% cotton quilt batting, never polyester which can melt), and a 22x22cm backing square. Baste all three layers together, then stitch diagonal quilting lines at 4cm intervals across the surface. Cut four strips of binding fabric at 6cm wide and the length of each side plus 5cm. Press in half lengthwise, wrap around each edge, and stitch in place. Attach a small folded loop of binding fabric at one corner for hanging.
Shop The Look
| Product |
|---|
| Quilting cotton fabric fat quarter bundle coordinating |
| 100% cotton quilt batting by the yard natural white |
| Quilting ruler transparent grid 15x60cm acrylic |
| Binding clips wonder clips set sewing quilting |
| Rotary cutter 45mm ergonomic craft quilting |
3. Fabric Produce Bags (SMALL SPACE / ACCESSORIES)
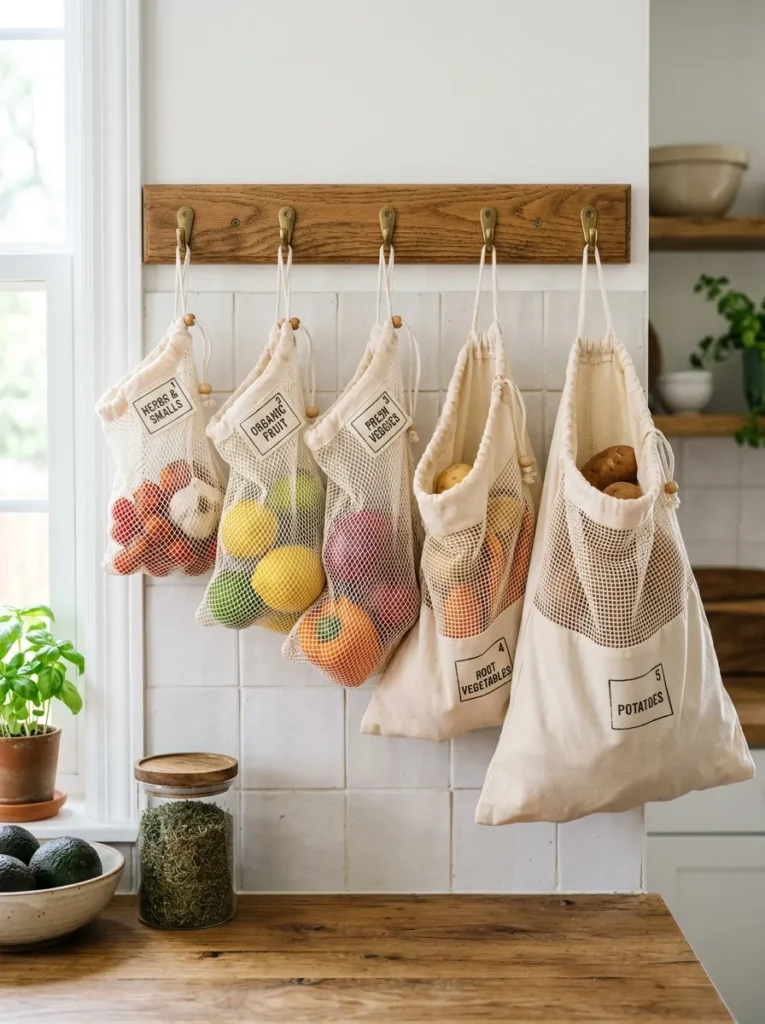
Vibe: The bags feel fresh and purposeful — the domestic equivalent of a small environmental act that also looks genuinely considered.
Why it works: Fabric produce bags are among the most achievable sewing projects for absolute beginners because they require only a rectangle of fabric, one drawstring casing seam, and a length of cord — no shaping, no curves, no complex construction. Cotton mesh fabric (also sold as tulle or bobbinet) allows produce to breathe and remain visible, which replicates the function of single-use plastic produce bags entirely. A set of five in graduated sizes — small for herbs and chilies, medium for apples and tomatoes, large for potatoes and onions — constitutes both a complete functional kitchen kit and a cohesive handmade gift.
How to get it: Cut mesh or muslin rectangles at double the desired finished bag height plus 8cm for the drawstring casing, and the desired finished width plus 3cm for side seams. Fold in half widthwise with right sides together and stitch the side seam from the bottom to 4cm below the top fold — leave the top 4cm open on both sides. Fold the top edge down 1cm, then another 3cm, and stitch around the full perimeter close to the lower folded edge to create the drawstring casing. Thread cotton cord through the casing using a safety pin as a threading guide.
Shop The Look
| Product |
|---|
| Cotton mesh fabric white by the yard produce bag |
| Natural muslin unbleached cotton fabric by the yard |
| Cotton drawstring cord 5mm natural white 10m reel |
| Large safety pin set drawstring threading tool |
| Fabric stamp ink botanical eco label marker |
4. Zippered Pouch (ACCESSORIES)
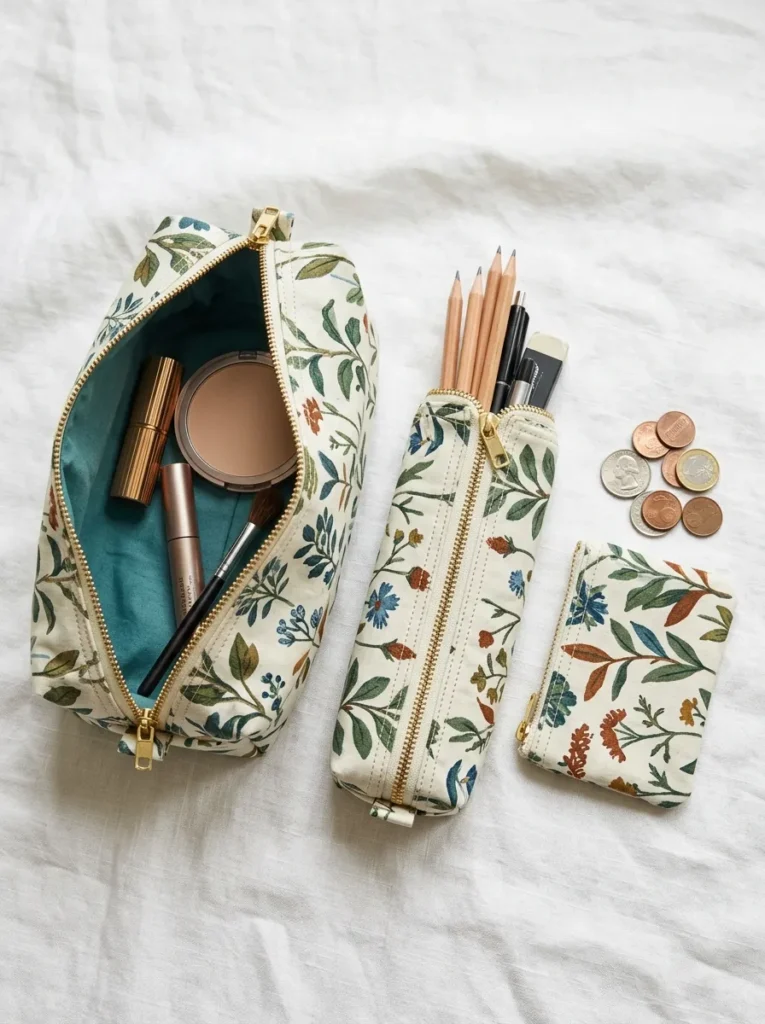
Vibe: The pouches feel practical and quietly polished — makes that look more technically demanding than they actually are.
Why it works: The zippered pouch is the sewing project that most dramatically accelerates a beginner’s skill development because it introduces the zipper — the technique that most beginners fear most — in the simplest possible context. A flat zippered pouch requires only two zipper installation seams, two side seams, and optional corner boxing, meaning the zipper is learned in complete isolation from other complex techniques. Once a sewist can confidently install a zipper in a flat pouch, every bag, garment, and accessory project that uses a zipper becomes accessible. A set of three pouches in graduated sizes, made from the same fabric combination, constitutes a genuinely desirable and immediately functional gift.
How to get it: Cut two rectangles of outer fabric and two of lining fabric at the desired finished size plus 1.5cm seam allowance on all sides. Place one outer fabric rectangle face-up, lay the zipper face-down along the top edge aligning the raw edges, then lay one lining rectangle face-down on top — sandwich the zipper between the two fabric layers and stitch along the top edge using a zipper foot. Repeat for the second side of the zipper with the remaining two fabric pieces. Open the zipper halfway, then stitch the outer fabric pieces right sides together around three sides, and the lining pieces right sides together around three sides, leaving a 10cm gap in the lining base for turning. Turn right side out, close the lining gap, and push the lining inside.
Quick Win: A 30cm brass nylon-coil zipper ($1.50–$2.50 each) produces a far more polished finish than a plastic-toothed zipper at the same price point — the brass hardware elevates even the simplest cotton pouch into something that looks genuinely premium, and nylon coil is significantly easier for beginners to install than metal teeth.
Shop The Look
| Product |
|---|
| Brass nylon coil zipper 30cm set of 5 quality |
| Quilting cotton fabric fat quarter bundle print |
| Zipper foot presser foot universal sewing machine |
| Fusible fleece interfacing medium weight by yard |
| Rotary cutter self healing mat set craft cutting |
5. Linen Cushion Cover with Envelope Back (ACCESSORIES / COLOR)
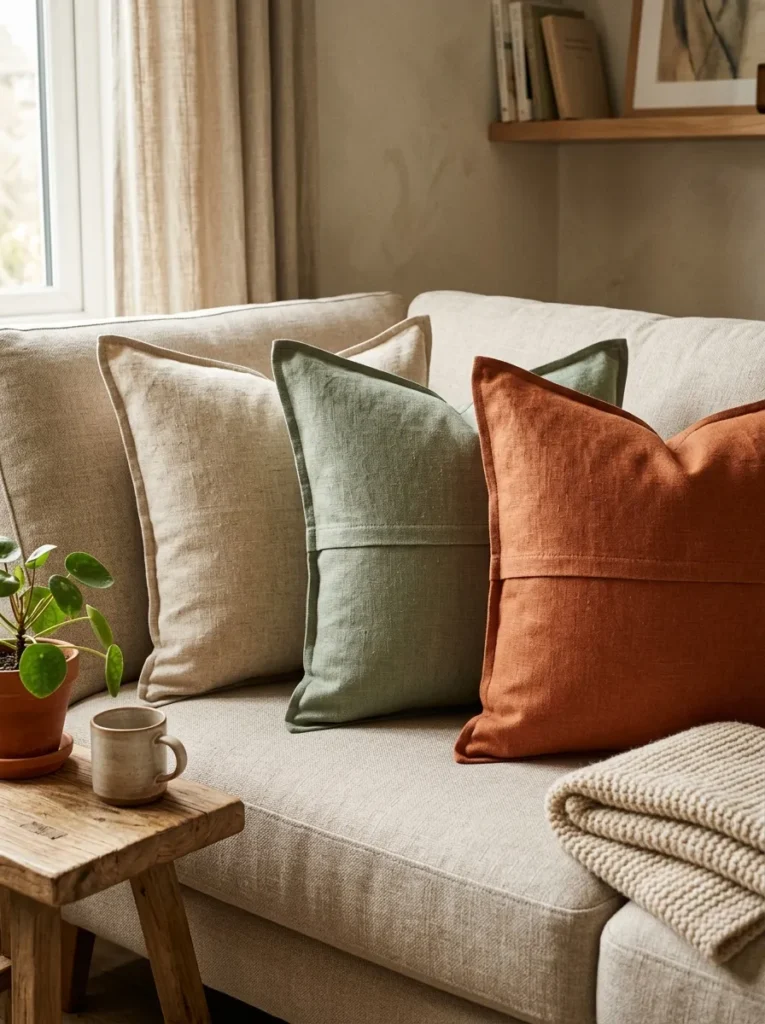
Vibe: The cushions feel considered and quietly luxurious — linen covers that make any sofa look like it was deliberately designed.
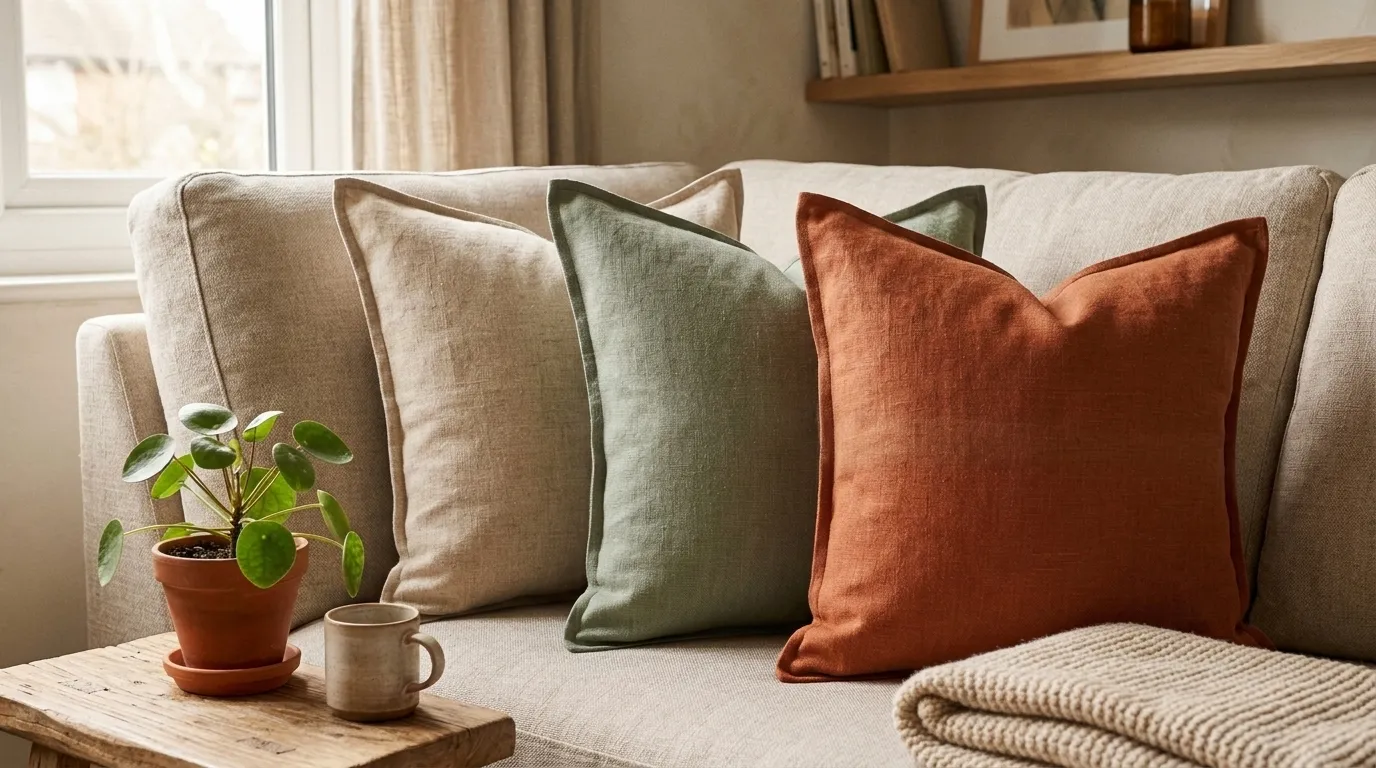
Why it works: The envelope-back cushion cover is the ideal home décor sewing project because it requires no zipper, no buttonhole, and no closure hardware — the envelope overlap at the back of the cover holds the cushion pad in place through the tension of the overlap itself. This elegant simplicity makes it genuinely achievable in under an hour for a complete beginner, while the finished result — a properly pressed, topstitched linen cushion cover — looks as refined as anything available in a high-end homeware store. Natural linen is the ideal fabric: it presses beautifully, has a natural drape that softens into the cushion pad perfectly, and is available in a range of natural tones from undyed to sage to terracotta that coordinate without matching.
How to get it: For a 45x45cm cushion pad, cut one front panel at 47x47cm and two back panels at 47x31cm each. On each back panel, fold one long edge under twice by 1cm and topstitch — these hemmed edges will form the envelope overlap. Place the front panel face-up, then lay both back panels face-down on top, overlapping the hemmed edges at the center back by approximately 8cm. Pin all layers together around the perimeter and stitch a 1cm seam around all four sides. Clip corners, turn right side out, press, and topstitch 3mm from the edge around the full perimeter.
Shop The Look
| Product |
|---|
| Natural linen fabric by the yard medium weight |
| Dusty sage linen fabric by the yard upholstery |
| Cushion pad insert 45x45cm hollow fiber fill |
| Cotton thread neutral beige 500m reel quality |
| Dressmaking pins fine steel 0.5mm glass head |
6. Beeswax Wrap Fabric Pouch (MATERIAL)
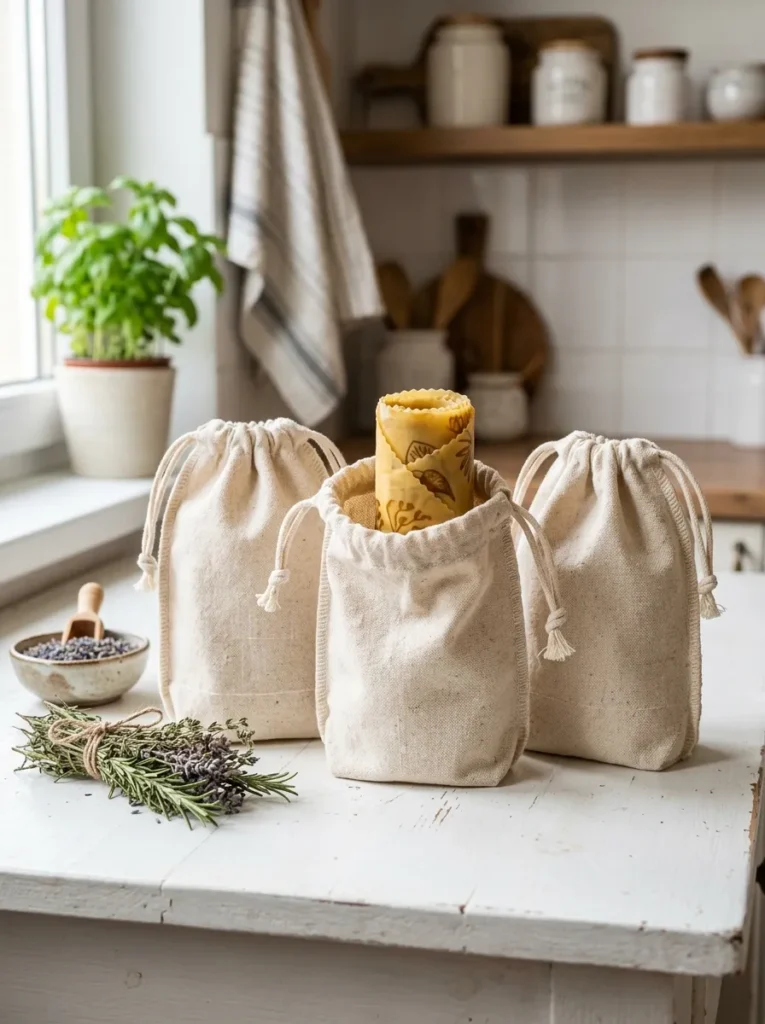
Vibe: The pouches feel purposeful and clean — the kind of small sustainable make that changes a kitchen drawer quietly and permanently.
Why it works: The fabric drawstring pouch is a beginner sewing project that introduces the French seam — a technique that encloses the raw fabric edge within the seam itself, producing a beautifully finished interior that requires no separate serging or zigzag stitching. The French seam is one of the most useful finishing techniques in sewing, used in high-quality garments and accessories, and learning it on a small pouch — where any imprecision is contained and easily corrected — makes it immediately transferable to all future projects. The unbleached cotton fabric and generous sizing makes these pouches ideal for storing beeswax wraps, bread rolls, loose leaf tea, dried herbs, or any pantry item that benefits from breathable fabric storage.
How to get it: To sew a French seam, place fabric pieces wrong sides together (the opposite of the usual method) and stitch at 6mm from the edge. Trim the seam allowance to 3mm, press the seam to one side, then fold the fabric so right sides are now together with the stitched seam at the fold line. Stitch again at 1cm from the fold — this second stitch encloses the first raw-edge seam entirely. The finished seam, visible on the inside of the pouch, shows only a clean folded line with no raw edges.
Shop The Look
| Product |
|---|
| Unbleached natural cotton muslin fabric by the yard |
| Cotton drawstring cord 4mm natural unbleached reel |
| Seam gauge ruler 15cm metal sewing precision |
| Small wooden toggle cord lock set craft sewing |
| Fabric pencil marking tool water erasable tailor |
7. Gathered Fabric Headband (ACCESSORIES / COLOR)
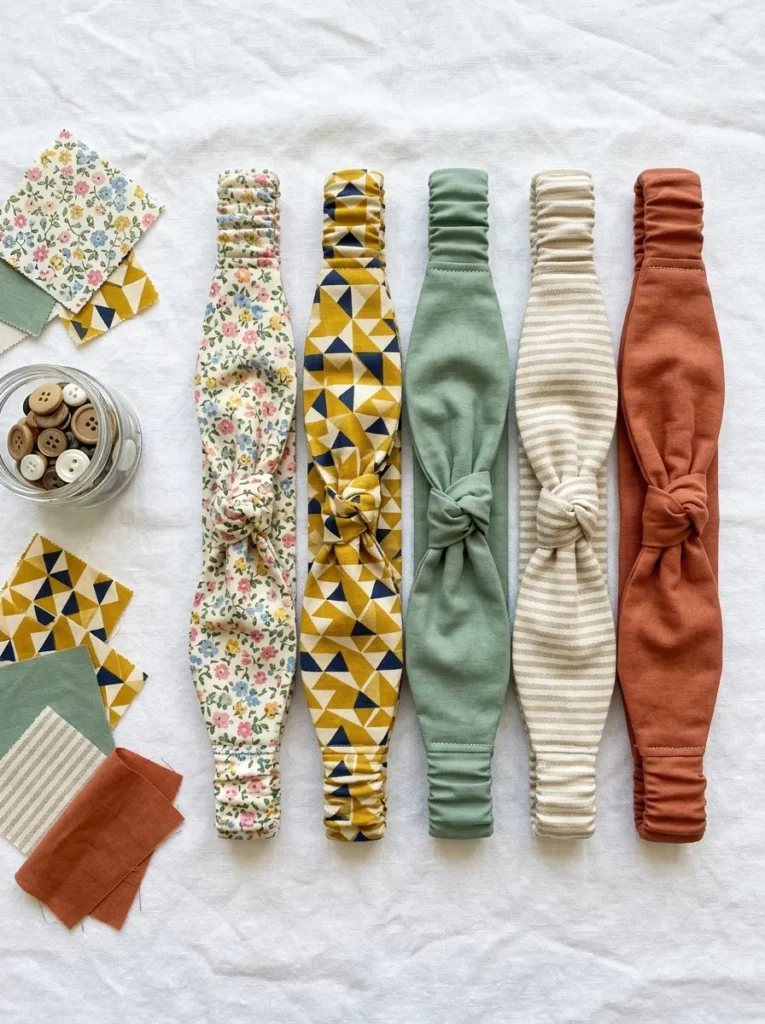
Vibe: The headbands feel fresh and immediately wearable — the kind of small make that uses fabric scraps and produces something genuinely delightful.
Why it works: The gathered fabric headband is the most satisfying small accessory sewing project because it requires less than 30cm of fabric, uses skills the beginner has already practiced in previous projects (straight seams, turning right-side-out through a small gap), and produces a finished wearable object in under 45 minutes. The gather at the center front is achieved by sewing a separate small fabric tube, wrapping it tightly around the center join of the main headband tube, and stitching the ends together at the back — this center knot technique is the design detail that elevates a simple fabric tube into something that looks properly finished and designed. A set of five using coordinating fabric scraps makes a genuinely lovely gift set.
How to get it: Cut a fabric rectangle at 60x15cm for the main headband and a 10x8cm rectangle for the center knot. Fold the main rectangle lengthwise right sides together and stitch the long edge at 1cm seam allowance, leaving both short ends open. Turn right side out and press. Thread a 25cm length of 2cm-wide elastic through the tube, stitch each end of the elastic to each short end of the tube, then join the two short ends together. Wrap the small center knot rectangle around the join, folding raw edges under, and hand stitch or machine stitch to secure at the back.
Quick Win: A single fat quarter of quilting cotton ($3–$5) yields four complete headbands with no fabric wasted — making a set of four coordinating headbands one of the best value-per-material sewing projects available to any sewist at any skill level.
Shop The Look
| Product |
|---|
| Quilting cotton fat quarter bundle 5 piece prints |
| Flat elastic 2cm wide white 2m reel sewing |
| Hand sewing needle set fine sharp assorted |
| Small safety pin set elastic threading tool |
| Fabric scissors 21cm dressmaking sharp blade |
8. Reusable Cotton Facial Rounds (SMALL SPACE / MATERIAL)
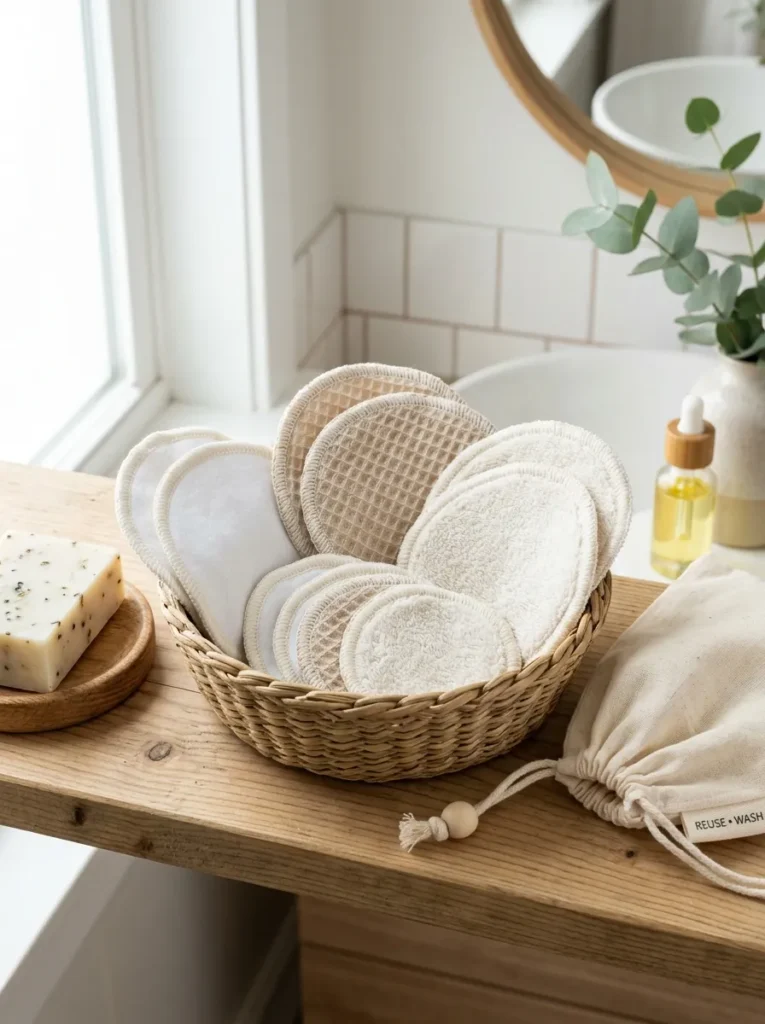
Vibe: The rounds feel soft and quietly purposeful — the smallest make with one of the most meaningful everyday impacts.
Why it works: Reusable cotton facial rounds are the ideal project for using up fabric scraps — every sewist accumulates offcuts of soft cotton jersey, French terry, and waffle cotton from other projects, and these rounds transform those offcuts into a genuinely useful zero-waste bathroom product. A set of twelve rounds — enough for a full week’s use between washes — constitutes a complete replacement for single-use cotton wool, and the handmade version in quality natural fibers is noticeably softer and more effective than any commercial alternative. The circular cutting and edge finishing introduces the sewist to the zigzag stitch, used here to finish the curved raw edge, which is the entry point to all curved seam work.
How to get it: Cut circles using a glass or jar lid as a template — a standard 8cm diameter produces the most versatile size for both face and eye makeup removal. For a two-layer version: cut two circles per round, place right sides together, stitch around the perimeter at 6mm leaving a 3cm gap for turning, clip the seam allowance at intervals around the curve to prevent puckering, turn right side out, and topstitch close to the edge. For a single-layer version in terry or waffle cotton: cut one circle and finish the raw edge with a close zigzag stitch at 3mm from the edge.
Shop The Look
| Product |
|---|
| Soft white cotton jersey fabric by the yard stretch |
| Natural waffle weave cotton fabric bathroom craft |
| Ivory French terry fabric by the yard soft finish |
| Small woven basket bathroom storage natural seagrass |
| Mesh laundry bag small zippered wash delicates |
9. Simple Drawstring Bag (LAYOUT)
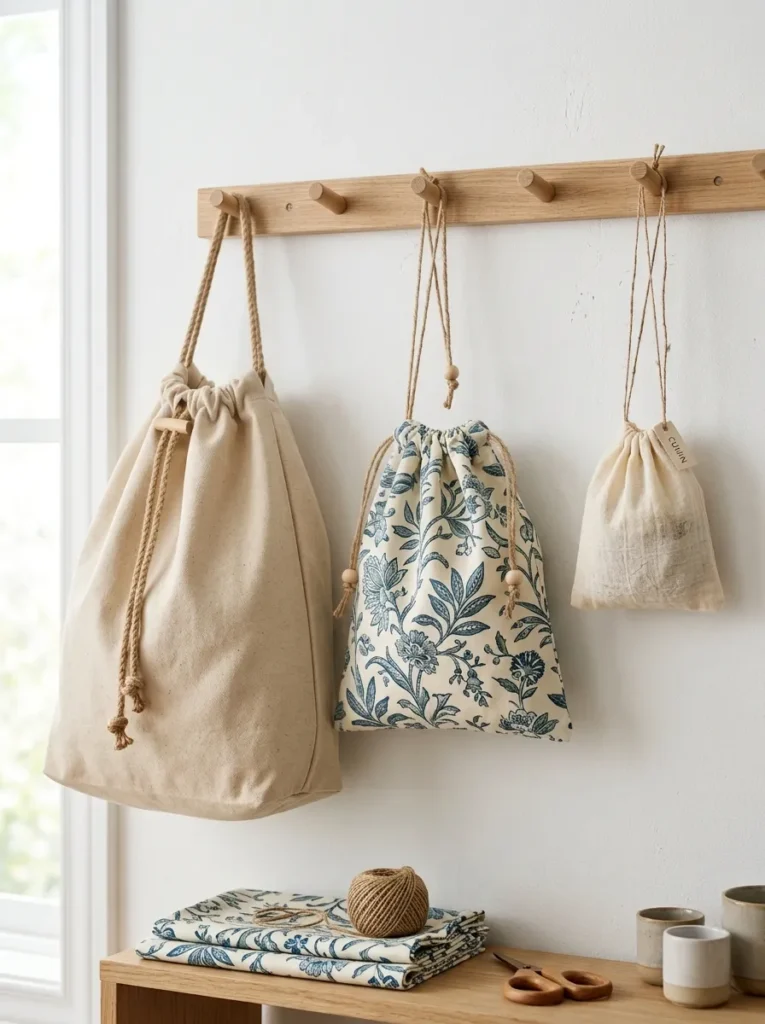
Vibe: The bags feel versatile and uncomplicated — the same simple construction scaled from a spice bag to a gym bag without a single pattern change.
Why it works: The simple drawstring bag is the most scalable sewing project in existence — the identical construction method produces a spice storage bag at 10x15cm, a gift bag at 20x25cm, a shoe bag at 30x40cm, and a gym kit bag at 40x50cm, with only the fabric choice and dimensions changed between versions. This scalability makes the drawstring bag the foundational construction project that teaches the sewist to think in terms of the underlying method rather than the specific pattern — a cognitive shift that accelerates skill development across all subsequent projects. The construction is genuinely simple: two rectangles, two side seams, one drawstring casing, one length of cord.
How to get it: Cut two fabric rectangles at the desired finished width plus 3cm and the desired finished height plus 8cm. Place right sides together and stitch both side seams from 4cm below the top edge to the bottom, leaving the top 4cm open on both sides — these openings will become the drawstring channel exits. Press the top 1cm under, then fold another 3cm down and stitch to form the casing, stitching twice for security. Thread two lengths of cord through the casing from opposite sides — each cord enters one side opening, travels all the way around the casing, and exits the same side — so pulling both cord ends simultaneously closes the bag from both directions.
Shop The Look
| Product |
|---|
| Cotton canvas fabric natural 400gsm by the yard |
| Cotton print quilting fabric bag craft by the yard |
| Natural jute cord 5mm 10m reel drawstring |
| Seam ripper ergonomic handle quality sewing |
| Pressing cloth 100% cotton ironing protection |
10. Fabric-Covered Hoop Wall Art (ACCESSORIES / COLOR)
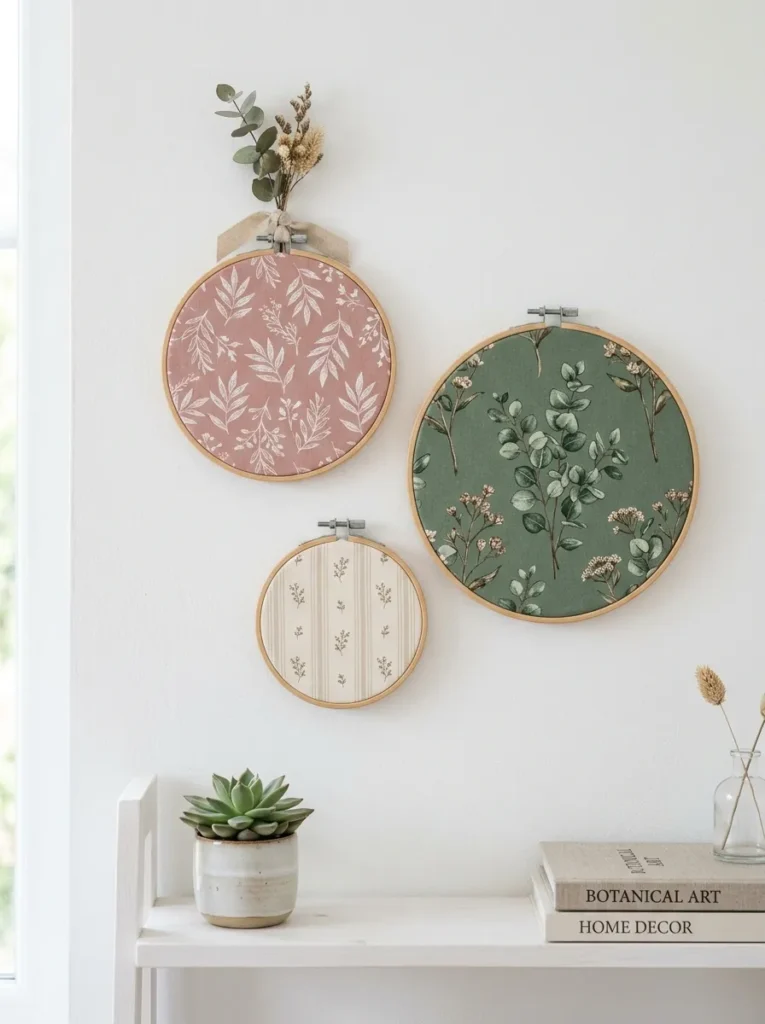
Vibe: The wall art feels fresh and confidently decorative — the fastest possible transformation of beautiful fabric into permanent room decor.
Why it works: Fabric-covered hoop wall art is technically the simplest project in this list — it requires no sewing machine, no needle and thread, and no cutting precision — and yet produces a finished decorative object with a high-design quality that exceeds its construction complexity entirely. The design principle is framing: an embroidery hoop acts as a circular frame that isolates a section of a print fabric and elevates it from yardage to art, in exactly the same way a picture frame isolates and elevates a print. The arrangement of three hoops in graduated sizes — large, medium, small — in a triangular cluster on a wall creates the same visual dynamic as a gallery wall at a fraction of the cost and effort.
How to get it: Separate the inner and outer rings of the embroidery hoop. Lay the inner ring on the wrong side of the fabric and place the outer ring over the top, sandwiching the fabric between the rings — tighten the screw slightly. Pull the fabric taut on all sides, working opposite sides alternately to maintain even tension and prevent the print from skewing, then fully tighten the screw. Trim the excess fabric to 2cm beyond the hoop edge and fold it inward, securing with a running stitch through the folded fabric around the perimeter to neaten the back. Attach a loop of ribbon or cord to the screw for hanging.
Quick Win: Three embroidery hoops in graduated sizes ($8–$12 for a set of three) plus one fat quarter of a botanical print fabric ($4–$6) produces a complete three-piece wall art arrangement for under $18 — the fastest and most impactful room decoration available at any budget level.
Shop The Look
| Product |
|---|
| Embroidery hoop set natural wood 12 18 25cm sizes |
| Botanical print quilting cotton fabric fat quarter |
| Linen ribbon 1cm narrow natural ivory hanging loop |
| Botanical print coordinating fabric bundle 3 prints |
| Hand sewing needle set fine sharp back neatening |
11. Gathered Ruffle Apron (LAYOUT / ACCESSORIES)
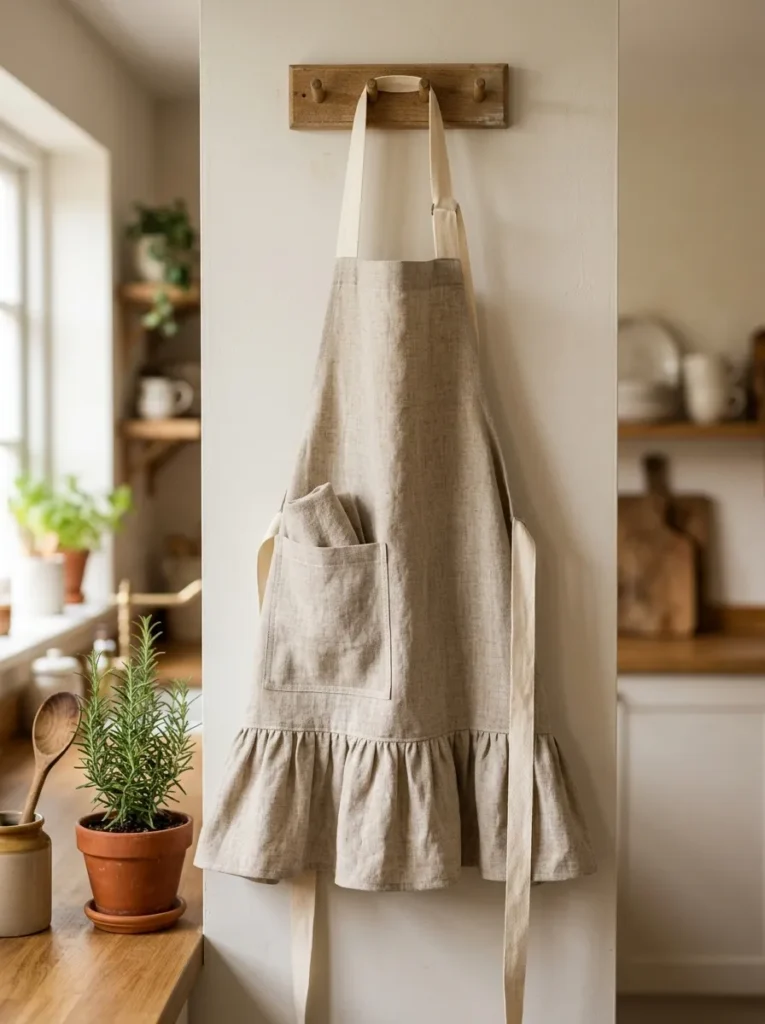
Vibe: The apron feels warm and properly domestic — the kitchen garment that makes cooking feel like something worth dressing for.
Why it works: The gathered ruffle apron introduces two new techniques in one project: gathering (creating evenly distributed fabric fullness along a seam line using a long stitch and then pulling the bobbin thread) and patch pocket construction (folding, pressing, and topstitching a square of fabric onto the apron front). Both techniques are foundational — gathering is used in skirts, sleeves, curtains, and cushion frills; pocket construction is used in virtually every garment — and both are learned here in a zero-risk context where the “wrong side” of the garment is never seen by anyone. The finished apron is a genuinely beautiful and useful object, suitable for everyday kitchen use or as a considered handmade gift.
How to get it: Cut the apron body at 65x80cm, the ruffle at 130x15cm (double width for gathered fullness), two ties at 90x8cm, one neck strap at 65x8cm, and one pocket at 22x20cm. Gather the ruffle by setting the machine to the longest stitch length and sewing two parallel lines along the top edge of the ruffle strip, then gently pulling the bobbin threads simultaneously until the ruffle matches the apron hem width. Pin the gathered ruffle to the apron hem right sides together, distribute the gathers evenly, and stitch. Hem the sides, attach the neck strap and waist ties, stitch the pocket in place, and press thoroughly.
Shop The Look
| Product |
|---|
| Medium weight natural linen fabric by the yard |
| Cotton fabric coordinating tie ivory by the yard |
| Apron pattern printable beginner PDF download |
| Gathering foot presser foot ruffler sewing machine |
| Tailor’s ham pressing curved seams tool |
12. Fabric Gift Wrap Furoshiki (COLOR / MATERIAL)
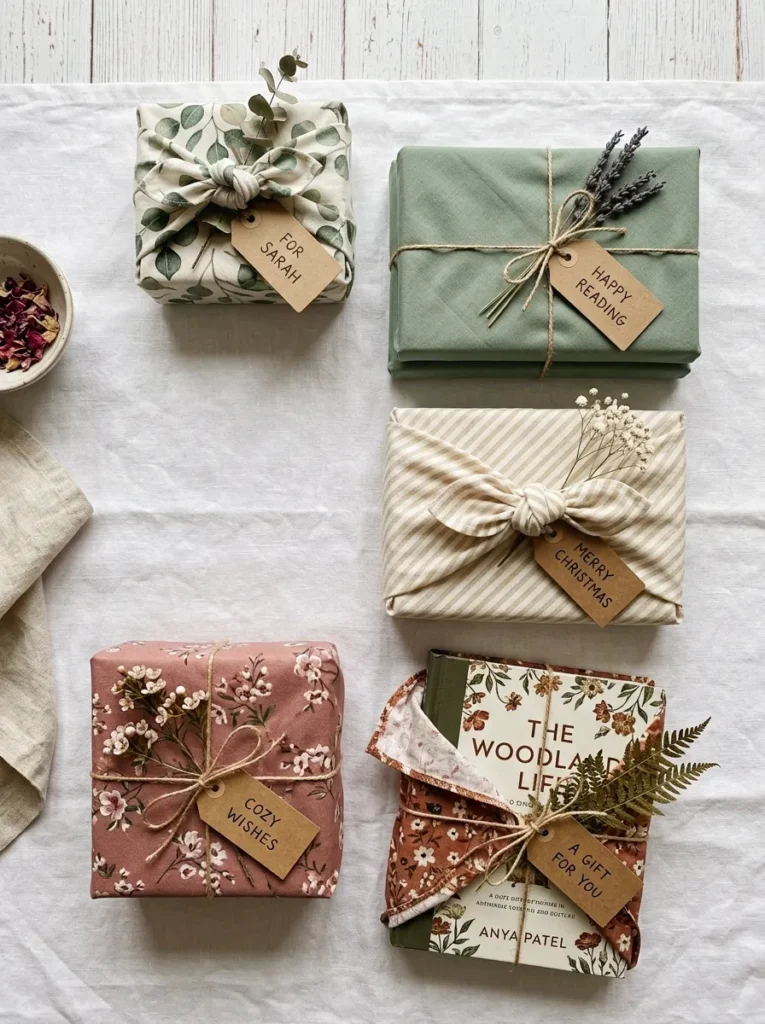
Vibe: The wraps feel warm and genuinely considered — gift presentation that is itself a part of the gift.
Why it works: Furoshiki fabric gift wrapping squares are the sewing project that produces the most immediate philosophical satisfaction — they eliminate single-use wrapping paper entirely while producing a second gift embedded within the first (the recipient keeps and uses the fabric wrap). The sewing construction is the simplest possible: a square of fabric with all four edges hemmed. This simplicity makes it the ideal project for practicing the perfect mitered corner hem — folding each corner at a precise 45-degree angle before hemming, which produces a clean diagonal corner join rather than a bulky folded corner. A mitered corner is the hallmark of professional fabric finishing, used in tablecloths, napkins, and fine linens.
How to get it: Cut fabric squares at three standard sizes: 50x50cm (for small gifts and bottles), 70x70cm (for medium boxes and books), and 90x90cm (for large boxes and clothing). To create a mitered corner: press a 1cm hem on all four sides, then open out the corner and fold it diagonally so the two pressed fold lines meet exactly, creating a precise 45-degree triangle. Trim the corner seam allowance to 6mm, refold the mitered corner, and press flat. Refold the hem on both sides of the corner and stitch around the full perimeter, pivoting at each mitered corner.
Shop The Look
| Product |
|---|
| Quilting cotton fabric bundle coordinating prints |
| Pinking shears fabric scissors zigzag edge craft |
| Mitering tool corner template fabric gift wrap |
| Kraft paper gift tag set natural brown set of 20 |
| Dried botanical sprig bundle natural gift decor |
13. Padded Tablet Sleeve (SMALL SPACE / LAYOUT)
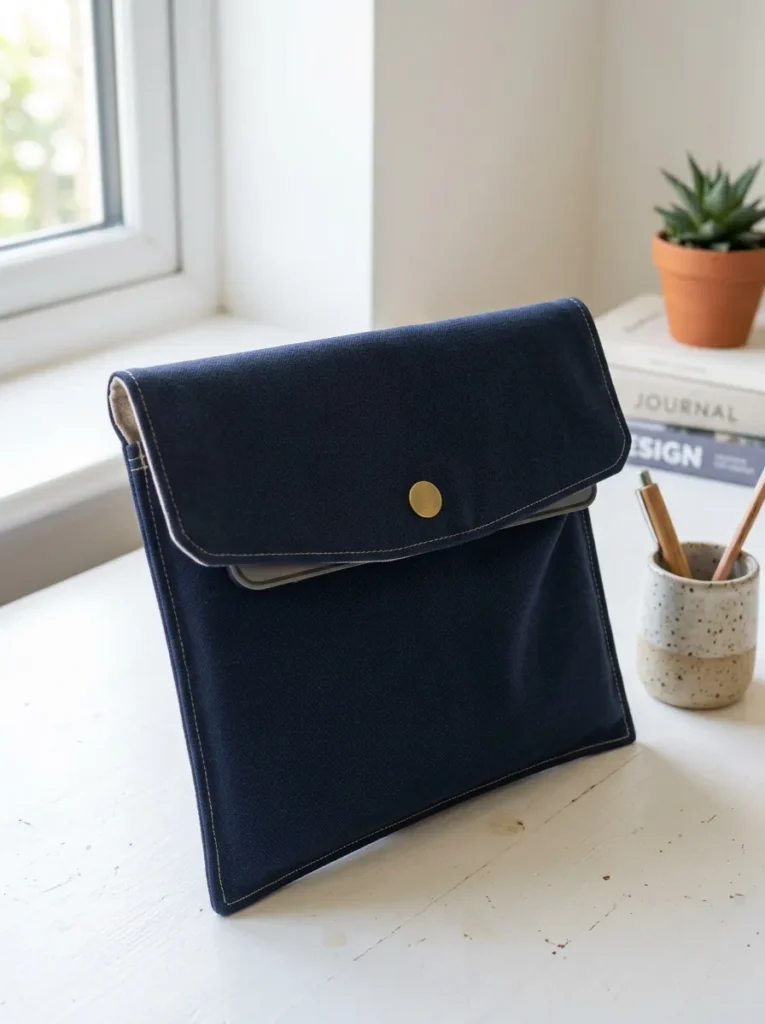
Vibe: The sleeve feels functional and quietly considered — the made-to-measure quality that no purchased accessory quite provides.
Why it works: The padded tablet sleeve introduces fusible fleece interfacing — a material that is ironed onto the wrong side of fabric to add padding, structure, and body — which is one of the most widely used and most underappreciated materials in all of sewing. Once a sewist understands fusible fleece, it becomes a tool applied across dozens of projects: bags, pot holders, laptop cases, book covers, and camera cases all use it to achieve their padded, structured quality. The magnetic snap closure introduces hardware installation — a skill used in bags and purses of all types — in its simplest application, requiring only a snap and a screwdriver.
How to get it: Measure the tablet and add 2cm to both dimensions for ease and seam allowance. Cut two outer fabric rectangles, two lining rectangles, and two fusible fleece rectangles at this measurement. Fuse the fleece to the wrong side of both outer fabric pieces following the manufacturer’s instructions. Install the magnetic snap halves on one short edge of each outer piece before assembly — mark the position, cut small slits, insert the snap prongs, and bend them flat with the metal washer. Place outer pieces right sides together and stitch around three sides, leaving one short end open. Repeat for the lining, leaving a gap for turning. Place outer inside lining, stitch the open end together, turn through the gap, and topstitch the opening edge.
Shop The Look
| Product |
|---|
| Cotton canvas fabric navy heavyweight by the yard |
| Natural linen fabric lining weight by the yard |
| Fusible fleece interfacing padding by the yard |
| Magnetic snap closure set 18mm brass set of 5 |
| Teflon presser foot canvas heavyweight sewing |
14. Simple A-Line Skirt (COLOR / LAYOUT)
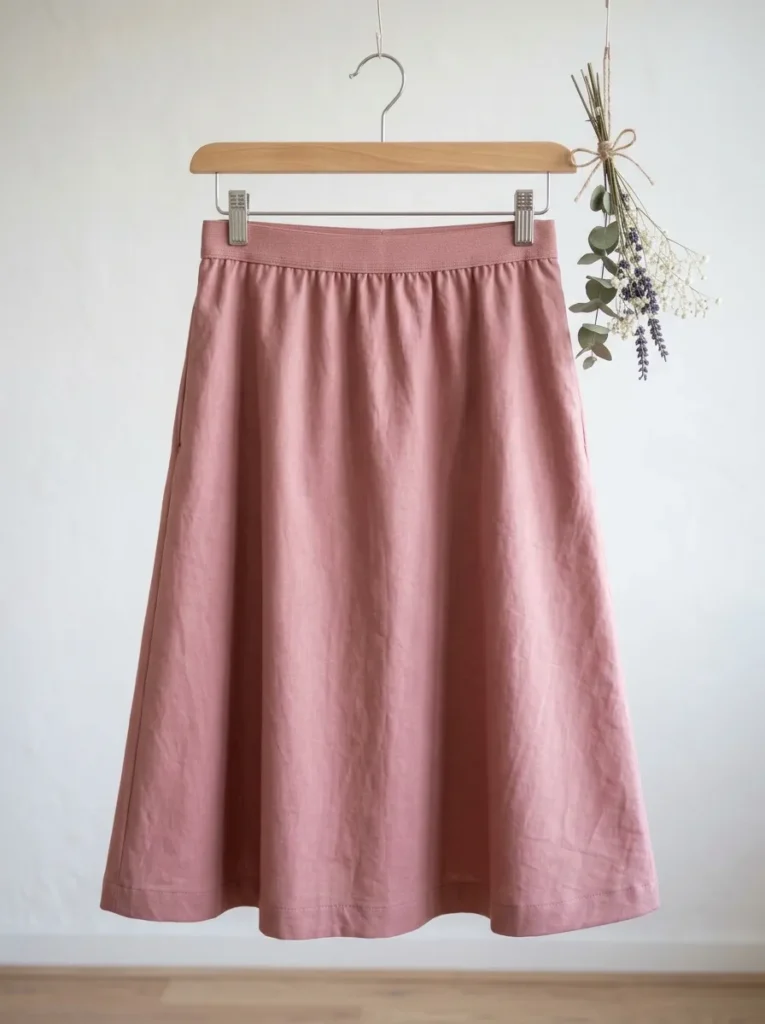
Vibe: The skirt feels fresh and genuinely wearable — the first garment project that feels like fashion rather than craft.
Why it works: The simple A-line skirt with an elasticated waistband is the most successful entry point into garment sewing because it eliminates the two elements that make garment sewing feel intimidating — fitted seaming and precise waist measurement — while producing a finished wearable garment of genuine versatility and style. The elasticated waistband requires no precise waist measurement, accommodating a range of sizes comfortably; the A-line silhouette requires no fitting adjustments at the hip; and the single invisible side seam pocket — cut in one piece with the skirt side seams and requiring no separate construction — introduces pocket sewing in its most straightforward form. Cotton lawn is the ideal fabric for a first skirt: it is lightweight and elegant, presses beautifully, and does not fray aggressively while cutting.
How to get it: Use a simple A-line skirt pattern or draft your own: cut two identical trapezoid panels, wider at the hem than at the waist, at your desired skirt length plus 5cm for waistband and hem. For in-seam pockets: cut four small pocket bag pieces in a coordinating fabric and stitch one to each skirt side seam before sewing the side seams, following the pocket bag curve. Join the two main skirt panels at the side seams, leaving a pocket opening. Fold the waistband (the top 5cm of the skirt) under twice and topstitch, leaving a 5cm gap to thread elastic through. Hem the skirt at 2cm, pressing carefully before the final topstitch for a crisp, professional finish.
Quick Win: A half-meter of cotton lawn in a solid dusty rose, sage, or warm terracotta tone produces a skirt to knee length with no pattern matching required — the simplest possible fabric choice for a first garment that still produces a beautiful, wearable result.
Shop The Look
| Product |
|---|
| Cotton lawn fabric dusty rose lightweight by yard |
| A-line skirt sewing pattern beginner PDF printable |
| Flat elastic 3cm wide waistband quality sewing |
| Dressmaking shears 25cm fabric scissors sharp blade |
| Tailor’s chalk marking pencil fabric sewing |
How to Start Your Sewing Project Journey
Your single best first move is to make the linen tote bag before any other project on this list — not because it is the most impressive, but because it contains every foundational sewing skill in its simplest form: cutting fabric accurately, sewing a straight seam, pressing seams open, and reinforcing a stress point. Complete this one project successfully and every subsequent project on this list becomes meaningfully more accessible, because the muscle memory for straight seam sewing and the confidence of a completed, usable object changes how you approach every make that follows.
The most common beginner mistake is sewing with a blunt needle and cheap thread simultaneously. A blunt needle skips stitches, pushes fabric rather than piercing it cleanly, and creates tension problems that appear as looping thread on the fabric surface — problems that beginners typically blame on machine tension settings and spend hours adjusting, when changing the needle takes 60 seconds and solves the problem immediately. The fix is simple and inexpensive: change the needle at the start of every new project (a pack of 10 universal needles costs $3–$5 and lasts most beginners six months), and use a quality 100% cotton thread matched as closely as possible to the fabric color. These two supplies — fresh needle, quality thread — are responsible for a greater proportion of sewing success than any other single variable.
Three specific items under $50 that unlock the greatest range of projects simultaneously: a self-healing cutting mat with a rotary cutter and quilting ruler set ($25–$35 for a beginner bundle) that makes cutting fabric accurately faster and more precise than scissors alone, and is used in every project on this list; a pack of 10 quality universal sewing machine needles in sizes 70/10, 80/12, and 90/14 ($4–$6), covering every fabric weight in the list from cotton lawn to canvas; and a 500m reel each of warm cream and soft grey cotton thread ($6–$8 total), which between them match sufficiently well to every neutral and earth-tone fabric used across all 14 projects to eliminate thread-matching anxiety entirely.
A simple beginner project — the tote bag, the produce bags, the facial rounds, the hoop wall art — takes 30–90 minutes and costs $5–$15 in materials. An intermediate project — the zippered pouch, the cushion cover, the drawstring bag, the headband — takes 1–3 hours and costs $8–$20 in materials. The more involved projects — the apron, the tablet sleeve, the A-line skirt — take a full afternoon or day and cost $15–$35 in materials. A basic home sewing machine ($80–$150 for a reliable beginner model) is the only significant one-time investment, and it pays for itself in completed projects within the first three months of regular use.
Frequently Asked Questions About Easy Sewing Projects
What is the easiest sewing project for a complete beginner with no experience?
The fabric-covered hoop wall art requires no sewing at all — only stretching and tightening — making it the single most accessible project for someone with zero sewing experience who wants to produce a finished object immediately. For a first machine sewing project, the reusable cotton facial rounds and the fabric produce bags are the most beginner-accessible makes that involve actual stitching: both require only straight seams and a zigzag stitch, both use small amounts of inexpensive fabric, and both produce genuinely useful finished objects in under an hour. The tote bag is the best first project for anyone who has used a sewing machine at least once before and wants to build real foundational skills.
What sewing machine do I need for these projects?
Any basic entry-level sewing machine with straight stitch and zigzag stitch capability is sufficient for every project in this list. Machines from Brother, Singer, and Janome in the $80–$150 price range include all the stitches and features needed for every project here, including buttonhole capability for future projects beyond this list. The features that matter most for beginners are: a drop-in bobbin (easier to load than a front-loading bobbin), an automatic needle threader (reduces frustration significantly), and a free arm (useful for cylindrical sewing like headbands and sleeves). Avoid purchasing a machine below $60 — at that price point, stitch quality and mechanical reliability are genuinely compromised.
How much fabric do I need to get started?
A starter fabric collection sufficient to attempt every project in this list requires approximately 5–6 meters of fabric total: one meter of medium-weight natural linen (covers the tote bag and cushion cover), one meter of quilting cotton in two or three coordinating prints (covers the potholders, zippered pouches, headbands, and hoop art), half a meter of cotton canvas (tablet sleeve and drawstring gym bag), half a meter of soft cotton jersey or French terry (facial rounds), and half a meter of cotton lawn for the skirt. Purchased as a starter collection, this full fabric selection costs approximately $35–$55 depending on fabric quality and source — online fabric retailers consistently offer better selection and price than high street fabric shops.
How do I finish raw fabric edges without a serger?
The three most effective raw edge finishing methods available on a standard home sewing machine are the zigzag stitch (set to 3mm width and length, sewn directly over the raw edge), the three-step zigzag stitch (a wider, more secure version available on most machines as a separate stitch setting), and the French seam (which encloses the raw edge within the seam itself, requiring no separate finishing). For home décor projects where the interior is rarely seen, pinking shears — scissors with a zigzag blade that cuts a notched edge resistant to fraying — are the fastest finishing method and require no machine sewing at all. A serger or overlocker produces the most professional edge finish but is not necessary for any project in this list.
How do I choose the right thread for a sewing project?
Match thread fiber to fabric fiber as the primary rule: 100% cotton thread for cotton and linen fabrics, polyester thread for synthetic fabrics, and silk thread for silk and fine wool. Cotton thread is the safest all-purpose choice for every project in this list — it has slightly less stretch than polyester, which is an advantage for woven natural fabrics that do not themselves stretch. Thread weight matters: standard 50-weight thread is correct for all medium-weight fabrics; 40-weight (slightly heavier) is better for canvas and denim; 60-weight (very fine) is better for cotton lawn and lightweight projects. Match the thread color to the dominant color of the fabric as closely as possible — when an exact match is unavailable, choose a shade slightly darker than the fabric rather than lighter, as darker thread blends more readily into fabric surface than lighter thread.
Ready to Start Your Easy Sewing Project Journey?
These 14 projects span the full range of beginner and confident-beginner sewing — from the no-stitch hoop wall art and the 30-minute produce bags through to the satisfying construction of the zippered pouch, the domestic warmth of the gathered apron, the sustainable purpose of the furoshiki wrap, and the genuine achievement of a first wearable A-line skirt — covering accessories, home décor, gifts, and garments across every skill-building milestone. Begin with the tote bag today rather than waiting until you feel ready — readiness in sewing, as in most skills, comes from doing rather than preparing, and the linen tote bag will teach you more in one afternoon than any amount of research. Today’s specific action: identify one length of fabric you already own — a pillowcase you no longer use, a length of cotton from a previous project, a linen tea towel that has seen better days — and cut two rectangles from it for a tote bag, because the act of cutting is the moment a project actually begins. When you hold your first finished make — seams pressed, edges clean, object functional and beautiful in your own hands — you will understand exactly why sewing earns its devoted, lifelong community of makers who never quite stop reaching for the next project. Save your favorites now, especially the zippered pouch and the A-line skirt — they are the two makes that, once mastered, open every sewing door that follows.